What is Needed
1.RigPi Station Server (RSS)
a.A Raspberry Pi 3B+ or Raspberry Pi 4B*
b.5.1-volt, 3-amp Power Supply with a microUSB connector if using a Raspberry Pi 3B+ or a USB-C connector if using a Raspberry Pi 4B.
c.An Ethernet cable or Wi-Fi Internet connection to your router
d.Another computer or mobile device on the same network, or
e.A monitor with an HDMI connector for the Raspberry Pi 3B+ or a micro HDMI connector for a Raspberry Pi 4B. USB keyboard and USB mouse
f.For remote operations, a browser and Mumble VoIP client on your mobile device
2. Ham Radio Transceiver
a.CAT connection for computer control
b.CAT USB interface cable (or serial-to-USB adapter)
c.Audio cables for VoIP or digital mode software, CW and PTT keying cables or a radio with internal CODECs.
*Note: the MFJ-1234 cabinet is not compatible with the Raspberry Pi 4B because of connector locations.
Connecting RSS to the Internet (Ethernet Connection)
The drawings below are for the MFJ-1234 which uses a Raspberry Pi3B+ board. The MFJ-1234B/C have a slightly different design to accomodate the connectors on a Raspberry Pi 4B.
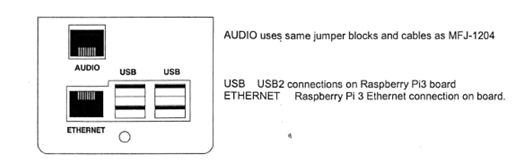
1.Connect an Ethernet cable from your router to RigPi Station Server.
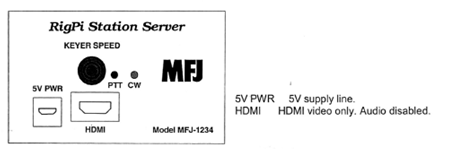
2.Plug in the RSS 5.1-volt power supply.
The two lights below the RSS KEY jack indicate power (red) and activity (green). The green light blinks as RigPi boots. The red light should not blink. If it does, the power supply may be underrated or faulty.
3.On another computer or mobile device connected to the same network, open a browser window. Navigate to rigpi3.local.
Apple Bonjour is required on Windows computers to find rigpi3.local. See the Technical topic in Help for more information on Bonjour.
Without Bonjour, you can use the RigPi IP address instead. Log in to your router and look at connected devices. You will see the Raspberry Pi listed there along with its IP address.
4.The RSS Login screen appears after RSS has completed the boot process. (See below.)
Connecting RSS to the Internet (Wi-Fi Connection)
RSS has built-in Wi-Fi if an Ethernet cable isn't convenient. If you need to connect using Wi-Fi rather than using an Ethernet connection, a monitor/keyboard/mouse must be connected to RSS.
1. Connect a computer monitor having an HDMI input (micro HDMI input if using a Raspberry Pi 4B), USB keyboard and USB mouse to RSS.
2.Plug in the RSS 5.1-volt power supply.
The two lights below the RSS KEY jack indicate power (red) and activity (green). The green light blinks as RigPi boots. The red light should not blink. If it does, the power supply may be underrated or faulty.
3.The Raspbian PIXEL Desktop appears after RSS has completed the boot process.
4.In the upper-right corner of the Desktop click the Network icon (Up/Down arrow).
5.Select Turn on Wi-Fi, then click the Network button again.
6.Select the network you wish to join from the list.
7.In the Pre Shared Key box enter your Wi-Fi password, then click OK.
8.While the Desktop is open, click the Raspberry Menu icon and navigate to Preferences>Raspberry Pi Configuration>Localization.
9.Enter the Locale, Timezone, Keyboard and Wi-Fi Country for your location.
10. Click the RSS icon (a Pi symbol) to start RSS. The RSS Login screen appears.
Set Screen Resolution
The Raspberry Pi desktop is set to a resolution of 640 X 480. To change to a higher resolution, open the Application menu on the desktop and go to Preferences>Screen Configuration. In the Configuration window go to Configure->Screens>HDMI-1>Resolution and select the resolution you wish to use. Go to Configure->Apply to set the resolution.
Connecting to your Radio
RigPi controls the frequency and mode of your radio through a CAT (Computer Aided Tuning) connection to a USB port. Most modern radios provide a USB connection which require a USB A-B cable. Older radios have a variety of connection requirements, although each manufacturer is usually consistent from one radio to another. Check the manual for your radio for specifics on what type of cable is required.
Manufacturer |
Older Model CAT Connection |
Kenwood |
DB9 Serial, requires serial-to-USB adapter |
Icom |
CI-V 3.5mm, requires CI-V-to-USB adapter |
Yaesu |
DB9 Serial, requires serial-to-USB adapter. Older Yaesu radios also require a level converter. |
Audio connections to your radio are covered later in this manual. CW Keying requires a cable between the KEY jack on RSS and your radio's keying input (more later).
Accessing RigPi
RigPi 3 can be accessed by entering rigpi3.local in a browser's navigation bar. If your browser can't find rigpi3.local, it may be necessary to install Bonjour on your computer. See Bonjour Help elsewhere in this manual for details. Alternatively you can use the IP address of RigPi 3 as found in the list of connected devices in your router.
Exploring RSS, Startup Windows
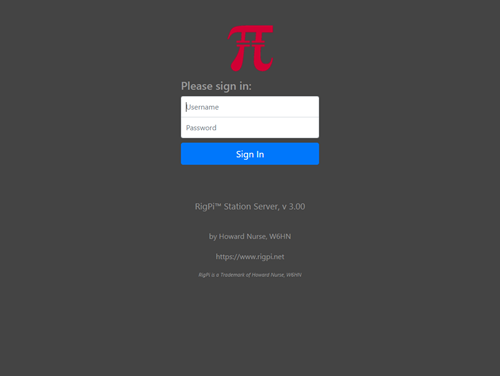
1.RSS is shipped with Username 'admin' and no (blank) Password.
2.Enter admin in the Username box.
3.Press Enter (leaving the Password field blank).
4.The RigPi Express User Settings window appears
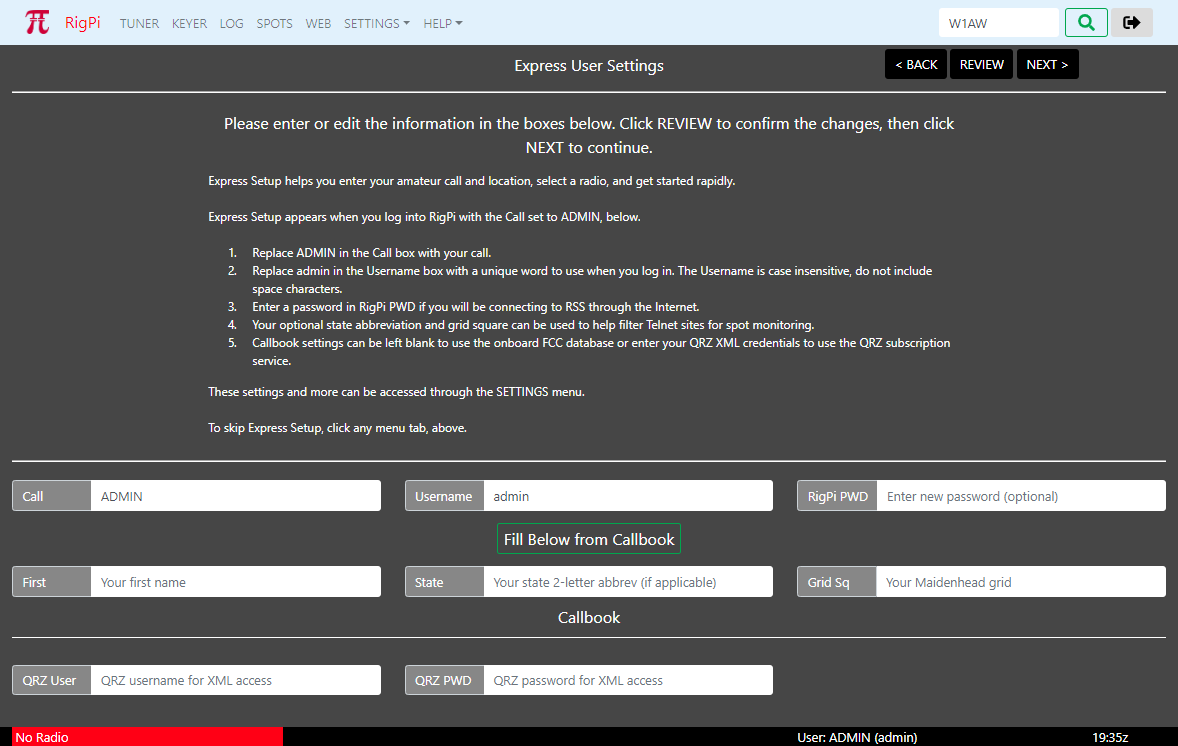
RSS Express Setup has two windows, each containing settings required to get you going rapidly. Express User Settings allows you to enter your Call, location, and optional QRZ XML subscription credentials.
Click Fill Below from Callbook to enter your name, state and grid square. If you haven't specified QRZ credentials, RigPi uses the onboard FCC database to fill in the information. This only works for US hams.
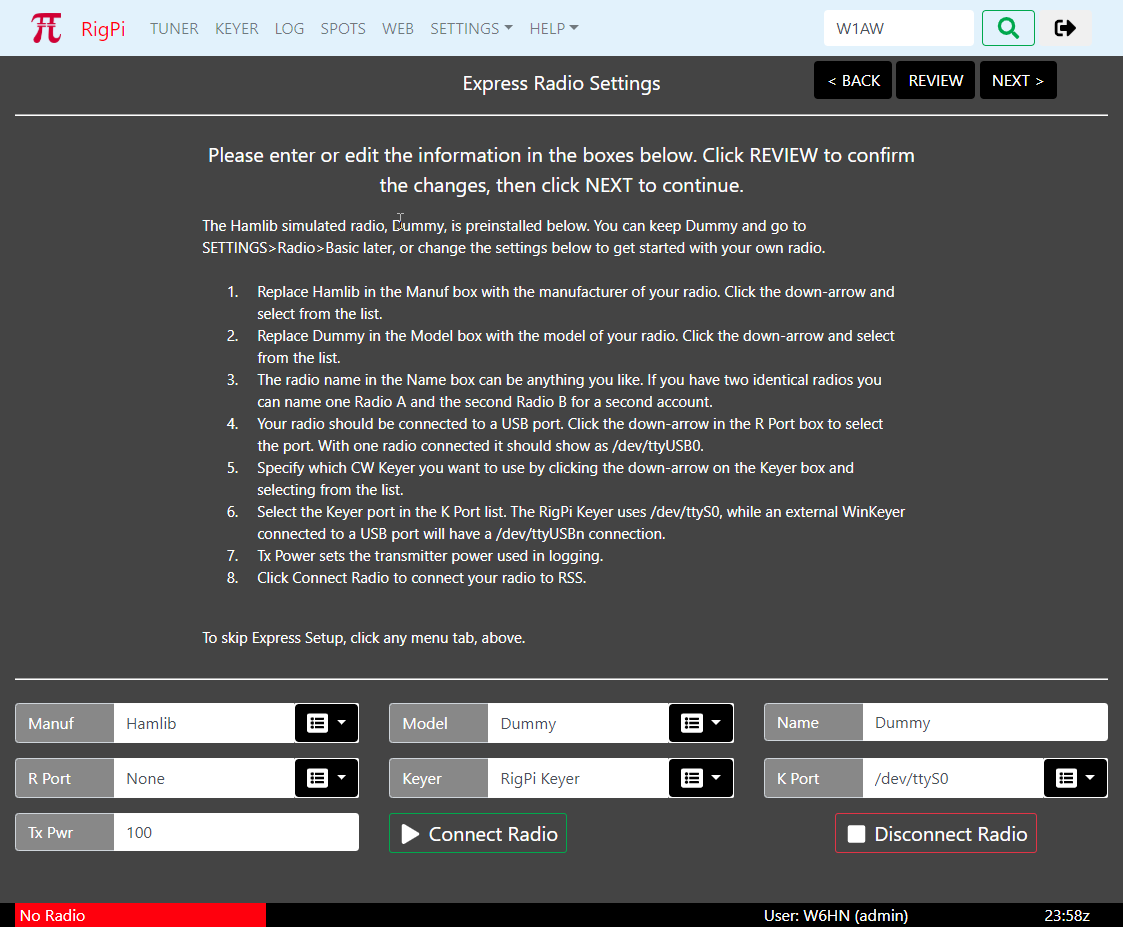
Express Radio Settings is configured with the Hamlib simulated radio, Dummy. You can set up your own radio or continue to use Dummy by skipping the Express Radio Settings.
Note: RigPi uses the default Baud rate for your radio. If you have changed the radio's Baud rate you must use that Baud rate in RigPi. Enter the Baud rate in SETTINGS->Advanced Radio.
Back Up Your Memory Card
Memory cards have a limited lifetime, so it is good practice to back up your card as insurance. For details on how to make a backup copy please refer to the System topic in the Troubleshooting section of Help.
Shutting Down
Never disconnect the RigPi Station Server power supply without shutting down the RigPi Raspberry Pi first. Disrupting the power before shutting down can corrupt the microSD memory card.
1.Go to SETTINGS>System.
2.Click the Shutdown button.
3.Wait for the green activity light to stop blinking.
4.Disconnect the power.
Enjoy RigPi! Additional Help is available
•RSS Toolbar Help
•Online forum: RigPi Forum
•RigPi online help: Online Help
•PDF Help file: Help PDF
•MFJ Online technical support: support
•MFJ telephone support: 1-662-323-0549